Monday 13 March 2017

Quilt Yarn Stitch! Busy but fun!


So things have changed..... I started my blog while being a full-time mum. I had a passion for sewing and spent most mornings at my machine while my babies napped. But of course, children grow out of naps, they get schedules of their own and suddenly you are a glorified chauffeur and life is dictated to by school runs, homework and meal-times!

As you adapt to your new routines, you find there are new pockets of time and you have to decide how to use them. I was already working at The Quilt Shop in Tuam and loving it...... and it was time to take it a little further. While not wanting to give up my time with my family (though they drive me crazy at times) and other commitments, I was excited by what lay ahead for the shop. Thankfully, I have a nice boss who lets us work around our family schedules and so my work hours changed from weekends to school mornings - ideal!

But between us we had a big job ahead....
 

The Team
Ursula, Karen, Me (Naomi), Eva, Roisin (Owner), Nora, Sandra.

So up until now, the shop has been named The Quilt Shop and while it's a very busy shop locally, based on Shop Street, Tuam in Co. Galway and would be considered one of the premiere quilting shops in Galway for it's stock of patchwork and quilting fabrics, notions, yarn, cross-stitch kits and more...... we were getting regular requests asking when all these gorgeous things would be online! However, it was time to rebrand, to let everyone know that it wasn't just a quilt shop anymore. While Patchwork is where our true love lies, the shop has expanded to stock a gorgeous selection of quality yarn, patterns and all things stitching! And so the shop name changed to "Quilt Yarn Stitch"!     
Our New and Improved Logo!
                              
So that was the first major job done, next came the Long-Arm Quilting Machine. That was such a big deal........ being a major purchase, we had to make the right one so we spent a lot of time doing research, getting quotes, organising funding, delivery and training but wow, it was so great to have it finally here and working away. You can often hear the buzz from the machine when you enter the shop..... in fact, passing by on the street, it's normal to see Roisin standing by and working away at the machine. I'm sure passing cars wonder why people stand on the street waving at the upper windows of the shop but it's always a nice distraction for us to see some friendly faces!

       
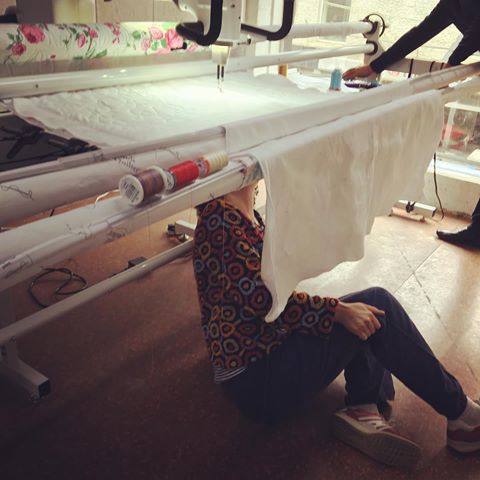
Roisin getting to grips with the machine during training!

Speaking of shop windows, they were changed too...... all part of the improvements! This has made for an excellent street view of our gorgeous fabrics and a much warmer shop! Win, Win!


Next up on the list was the website - oh boy, that was fun (not really). We were lucky enough to have a mega team from the very best website building company in the West of Ireland - DMac Media. to charge forward with that one!  Roisin knew what she wanted - what functions would help to make the very best webshop in Ireland and they worked their IT magic and made it happen. No request was too large, they never lost patience with our lack of technology skills and they made it all as easy and straightforward as possible.


We spent the next couple of months cataloguing every item in the shop - we needed to list every single fabric from Moda, Makower, Winbourne, Camelot, Stof, Dashwood Studios, Northcott, Blend Fabrics, Art Gallery, Kaffe Fassett, David Textiles............ and so much more. 


That was just the beginning.  We then had to move on to the yarn - listing the double knit, the 4-ply, the aran, the merino...... not forgetting the notions from Sewline, Hemline, Clover, Prym, Olfa, Creative Grids and more..... then the Gifts, the Patterns, the Ribbon, the Buttons ................... stock seemed to grow as we listed, it seemed we would never get to the end but we did it!


In the midst of this, we held our Annual Sale & our Facebook Sale, classes carried on and we had our little visitors spending time in the shop too, busy as ever!


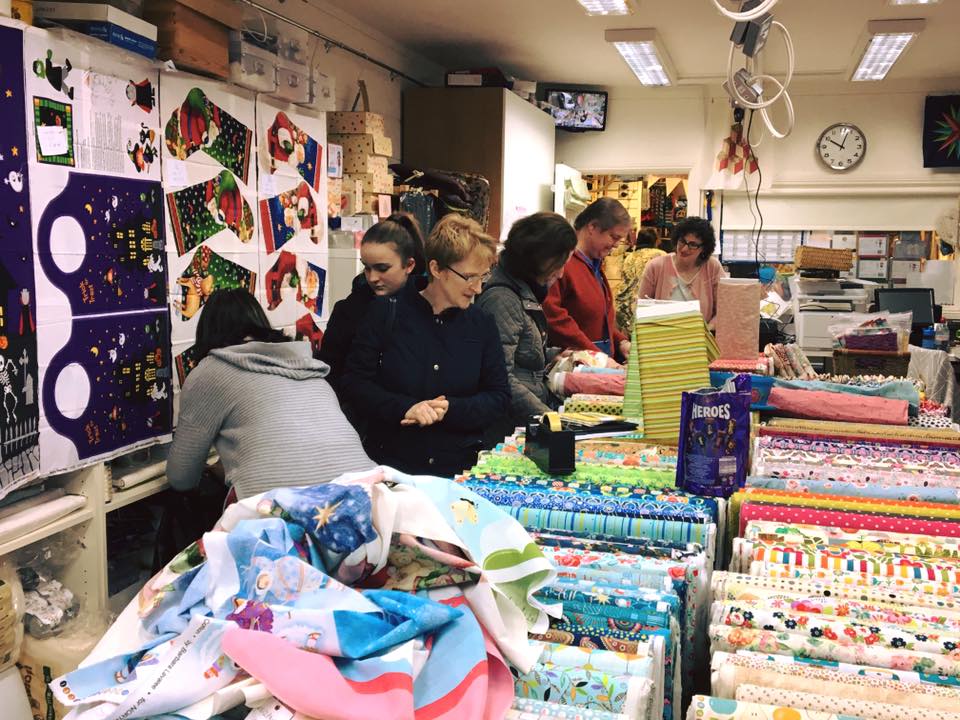
                           The busiest days - our annual sale!
                   
    Thursday Mornings Class Ladies!
                  
Molly & Kate working on the Rico Craft Kits!


The excitement was palpable the day the website went live! When the first order came in, we excitedly messaged each other - it was working!! Hooray!

Since then we have gone from strength to strength - increasing our stock online and making ourselves known to those in Ireland, the U.K. and beyond. We have become a popular stop for those travelling along the Wild Atlantic Way - bus tours and individuals who can't resist searching for a little something new for their sewing rooms back home. We have a great time with them swapping stories and ideas!  And we haven't stopped working to improve Quilt Yarn Stitch - both in the shop, in the classes and online! We're still having fun - how could we not, we are surrounded by pretty fabric and some really amazing people!

The fun continues every day..... there was the day we did some filming for the Local Enterprise Office with Bulabosca Productions....


And of course we always have Sales Reps popping in and tempting us with new goodies all the time...  this was Alan from Sirdar.  Wait till you see the fantastic yarn we ordered from him, it'll be in stock shortly. I don't even knit and I'm totally in love with it! 


If you haven't already - please check out our website www.quiltyarnstitch.com and let us know what you think! We love to hear some constructive feedback and take it all on board! I don't have shares in the business but I love what I do and am excited for it's progress so am eager for it's success! 

Ooooh and we still have FREE DELIVERY to Irish addresses and reduced delivery for Europe..........so it's a great time to shop online!

(p.s. if anyone can tell me why my text changes to grey and I can't change it back again, I'd appreciate it) xx


Friday 31 July 2015

Best Day Ever!

My hexie quilt is FINISHED!

Fabric range was mostly Best Day Ever by April Rosenthal and it was a super day when I finally finished this and got to use it!


  And I'm in love with it.  The colours are just happy and lively!  Exactly what I wanted!

My 11yr old picked the backing and binding colour.......turns out he has a pretty good eye!


 I had planned some scattered hexies on the back but they didn't look right so it's ended up plain
but I might add some larger ones at a later date!


Isn't it so pretty and totally girlie?


Thanks again to Raquel ( a.k.a. @colourmehappy2 on Instagram) for getting me started on my first hexie project by sending me a little pack of paper templates!   I think I'm definitely hooked on hexies!

Thursday 23 July 2015

Waistcoats for my boys!


As a mother of 3 boys, I'll admit there have been moments when I wish I had a little girl to dress up.  Especially once I started sewing.  Now, my need for a girl begins and ends there. I rather enjoy being the only girl in the house - mainly because my small boys think I'm a princess because they've nothing to compare me to!  I'm pretty fortunate that my boys do enjoy their style.  They love accessories - hats, ties, dickie-bows, backpacks and they have a thing for shoes.  In fact, they really differ on their choice of shoes whereas they love to match in almost everything else!

Anyway - I'm a quilter.  I don't sew domestic, my husband is chief button-sew-on-person in this house so the biggest clothing undertaking I have made is to mass produce a bunch of dickie bows about a year ago!


I have wanted to try other items but I honestly felt I'd mess it up big time!  But this year, with our annual 3-day convention in Dublin coming up, I was finding it difficult to source suitable, dressy clothes.  The boys happened to be growing out of most of their decent clothes.  So on a real lastminute.com, I found a pattern a couple nights before we left and started making my first real item of clothing for the boys!

This pattern was mega.  Very easy to follow, straightforward instructions.


  Thank you to the talented lady who put it together.  If you fancy trying it yourself, check her out here!
It took me a few hours to put it all together, I was making two of them though!  I was also using the polyester lining for the first time.  I bought a very thin one, I would probably go for the more expensive thicker one next time but for no reason in particular, I bought the cheap one just assuming I would mess it up - but I didn't! 


The only difficulty I had with the pattern was trying to figure out where to sew on the shoulders.  Once I thought it through though, it was straightforward - I guess I was just tired the night before when I got to that point!  And once that was done, I was at the end very swiftly and all of a sudden, ta-dahhhhhhh, I had two full size 4 year old funky waistcoats!!!!


Of course I made them matching dickie-bows too!  I just forgot to take a picture of them! These two little men wore their waistcoats with pride and told lots of people that their mammy made them!  It's sweet when they appreciate your efforts!

So who knows what's next...... after the quilts still on my to-do list, of course!


Tuesday 21 July 2015

Baby Aoifes Quilt

So I have finally got my sew-jo back but the problem with getting back in the swing of things is that you get a "need" to make so many different things, ideas that were floating around and you were pushing to the back burner.  Once you have the time and energy to sew proeprly again, you really want to make them all!!!  So I have been sewing all sorts of things, not blogging a whole lot in recent months but life has been busy!

Let me show you one of my little projects..... I have lots of blogging to catch up on so stay tuned for more posts of recent sewing exploits!


My lovely friend had a beautiful baby girl a few weeks ago.  I had these gorgeous Scrumptious by Moda Charm packs just waiting for the right project and decided they would make a super pretty quilt.  I went with a simple pattern but embroidered baby Aoifes details on it to make it personal and unique.


I usually have no problem handing over quilts as gifts but this one I'll miss.  I think it's just because of the utter girliness of the fabric.  That's rare in my house full of boys and this made my heart sing while I was working on it!


You really can't beat a red polka dot backing, I use it alot.  It's pretty and it's fun! Oh and I'm finally remembering to add labels to my quilts!  On this one I tried out the Micron acid free pens and made a handwritten lable.  I really prefer them embroidered but others have assured me that handwritten are just as precious! 

Quilts are made to be used and loved, washed and used again until they are threadbare.  Plus it adds some nice colour to the washing line, right?  I can't wait until baby Aoife is big enough to drag this round the floor with her!  


Tuesday 19 May 2015

Fancy Foxes!


I spotted this pattern on Instagram a few months ago and went on the hunt for the pattern.  I love these foxes.  Full of character, especially the dude with the glasses! 

In December we had our annual "Show & Tell Evening" at The Quilt Shop.  I needed to make something quickly since I had given away almost everything that I had made in the past year and had nothing to show! I did have my Storm at Sea Quilt top but nothing completely new and finished!

I decided to make the Fancy Foxes Quilt by Elizabeth Hartman (Fransson) in lap quilt size.  It meant just 4 simple blocks. 


Today I grabbed my mini-models to take a few pictures of the finished product.  They did their best to hold up the quilt for me to take a picture but it's very difficult when the quilt is bigger than you!  Sams eyebrow though (on the right), makes me laugh everytime I look at this next picture!


Two evenings and it was done and dusted!  I handquilted it with Perlé Cotton No. 8 in a simple heart design and used my scraps for binding.  The backing is another fox print - super cute little foxes that look like their are looking for mischief (just like the new owners of this quilt)!


On the front the quilting is subtle but it shows nicely on the back and the colour works very well with my backing fabric!


 The only thing I didn't get round to doing before the Show and Tell was sewing down the glasses.  I wanted to do it by hand with a buttonhole or blanket stitch and finally almost 6 months later, I pulled it out this week to do that and the boys having been having fun with it since!  It's hard to see the details of the stitching in this picture.......  I love buttonhole stitching though - and I love doing it by hand instead of using the machine!


It started to hailstone mid-photoshoot, hence the big black dots on the quilt...........the boys loved it though!  They were dressed for the weather, unlike me - I was out in my pj's since I've been sick all week!


You can see they love it!  They were watching tv here and most possibly mid-wrestle but still, they were snug as bugs!


Saturday 16 May 2015

Hexie Love!


My father had a short stay in Intensive Care a couple of months ago, just before he passed away.  We spent long days and evenings at the hospital.  I know I got a few funny looks while I sat in the family room with my little Bionic Gear Bag full of fabric scraps and hexie templates but I've said over and over again for the past 3 years that my sewing keeps me sane at times....... and while my hands and brain were busy, I was able to be there for hours on end.....and it served its' purpose, it kept me sane and one lovely thing I discovered during that tough time is that I love my newest portable sewing project - hexagons!! 


Recently, I won a little prize from colourmehappy2 on instagram.  I showed you the picture of my prize in my last blog post but this is it again.........


I made a tumbling block using English Paper Piecing way back when I made my Sampler Quilt but hadn't tried it since.  In my head, I had convinced myself that I couldn't make the points match.  How daft, the papers take all that effort away! 

After a few long days in the hospital, I grabbed my bionic gear bag on the way out the door and got through basting most of a pack of deliciously pretty Moda Mini Charms from the Best Day Ever Range.  How could anyone not be distracted by the beautiful bright colours? 


I tried two methods of basting - firstly, I was using a tacking stitch.  It's easy, it makes the paper or card templates secure but obviously you have to pull all those tacking stitches out later.  And next I decided to use the Sewline Glue Pen from The Quilt Shop (where I work, for those of you who didn't know) and see how that went.  I have had this in my sewing kit for well over a year and never used it.  I thought it was a glorified pritt stick and I just couldn't imagine it holding the fabric securely or for any length!  Well.......... I was wrong!  It was fast, super easy and way more secure than I could have imagined!  I have one less step to deal with when pulling out all the templates too!  Consider me converted! 

When I started, I honestly thought I would string a few together and make a notebook cover or a pencil case but I'm in love with these colours, so I'm going to make a lapquilt.  They're deliciously scrappy together and so bright and beautiful. As time has gone on, I've added quite a few extra colours from Moda's Daysail and another range called Just My Type (thank you to The Fat Quarter Shop for that mega sale) and some random scraps! 


This quilt will be totally different from ANYTHING in my house.  I have 3 sons and a husband, so my house is not what you'd call girlie.  However, check this picture out....... my husband bought me 2 of these footstools as part of my anniversary present recently.  How well does it match?  Now, I'll admit, I'm a bad wife, I took his gift back to the shop and exchanged them for 2 more sedate versions.  They actually have similar colours but aren't so ultra-violet-hi-viz-like......... and they still work great with the quilt!  If he was trying to match something though - he did well!!! 

I'm just about finished piecing the quilt top.  I'll shop it off properly once it's been quilted and bound.   I'd say it's about 45" x 55" roughly.  A nice lap quilt size and I'm seriously thinking about redecorating my livingroom to give this a proper home (alongside my new footstools)!

It's nice to slowly get my motivation back for sewing, it feels like I was off-track for the past while (understandably) but I feel like I'm getting somewhere again and it feels good!


Monday 23 February 2015

Handwarmers, Totes, a competition win and more........


My main "thing" is quilting but after finishing a couple of big quilts, lately I just needed a few small projects that I could start and finish fast!  And the fun I've had! 

First I made the Fabric Wreath that I showed you yesterday.  Check out my first ever little tutorial if you haven't seen it already.  It's a no-sew project so suitable for everyone!  You will see the Tutorial Link at the top of the page, under the header!


Then, I made a few hand warmers for my mum and a good friend, Georgie who has Reynauds Disease so always has blue hands in the cold.  I filled them with rice and added a few drops of cinnamon to give them a nice smell. 

Next, I wanted to make something for my friend who has recently taken up crochet.  We've been friends since we were 10.  I have always been the one who was into "make & do" and always had a box of some craft or other in the corner whether it was glass painting, jewellery, card making and eventually, my total addiction, sewing/quilting and it's lovely to finally be able to share the love of making with her.  So, when I found this pattern online, I had to buy it and make it up for her.

It was my first time making a tote....... I have to admit, the base was a bit of a challenge so it's not perfect but it taught me alot!

I get fierce excited when I start to see a project come together so it takes a little longer because I need to stop regularly to admire it....... hence this picture of it before even adding the lining and it's turned right side out!

  It's a Crochet Tote.  It has a fine big center to hold up to 5 full balls of wool and then all the way around there are different sized pockets to hold the crochet hooks (or knitting needles), scissors and any other related notions!  I chose bright and cheerful colours because she's young and funky (just like me, ha ha)! 

And finally, I had bought some of the Gorjuss Fabric about 6 months ago and just didn't know what to do with it but finally, FINALLY, I cut into it and made my friends two little girls some bags.  I did some straight line quilting on them (which I love since I haven't mastered free-motion yet) and they turned out cute. 


It's hard not to turn out cute when you are using anything Gorjuss by Santoro........... it's just adorable!
I used a stem stitch and added their names on too.  You can't see the names because I hadn't gifted them when I took the picture so I covered it up with a bit of selvedge!


Now, before I go.............check out my little "win" on Instagram.  I entered a little competition with @colourmehappy2 and I won!!!!

I got orange chocolate ( my fav) (well, one of my fav's), a funky fat quarter, a mini Moda Charm pack, some wonder clips and hexie templates!  EEEEEEEEEK, I'm going making hexies!!!!! How cool...........
Daft pic won't rotate properly - sorry!


Sunday 22 February 2015

No Sew Fabric Wreath Tutorial


I totally forgot I said I would do a quick tutorial on the super-easy, use-up-your-tiny-scraps Fabric Wreath that I made a couple of weeks ago. 

This requires NO SEWING whatsoever so is suitable for beginners!

Materials Needed:
Ruler
Rotary Cutter
Scraps
Florist Hoop (I got mine at The Quilt Shop, Tuam for €1)

Step 1:
Gather yours scraps.  You can use all one colour or for a truly scrappy effect, use a little (or a lot) of everything! I started with red and whites but quickly made my way through all the drawers for a rainbow of colours!  Selvedges with some text can add a bit of interest too!


Step 2: 

Cut the scraps to the desired length.  Mine are 1/2" x 5"
This takes some time but the growing pile of cut up scraps is really pretty all by itself!


Step 3:
Take your florists ring and a scrap and simply tie on!  Repeat this on both lines until your ring is chock full and you can't squeeze any more on.  The fuller, the prettier!


Please link back if you do try it........I'd love to see!